Monday, October 20, 2014

happy haunting


My favorite time of year for novelty nail art is almost upon us! Mwahahahahaha! What's not to love about Halloween? So many fun patterns, colors and spooky designs to do. I got bored the other day, and as usual... my response was to paint a nail wheel. A few are variations of previous designs (Frankenstein, Blood, Skeleton, and Candy Corn) and the rest are inspired by classic Halloween themes and symbols. Though I have never seen Nightmare Before Christmas, Jack Skellington is one of those classic and creepy faces that deserved a nail, and happened to be one of my favorites. I also loved how my 'Wicked' witch turned out, my vampire fangs, the glittery BOO, and the happy jack-o-lantern. 

Last Halloween with my favorite lil Mummy
Honestly there isn't much that I don't like on this set--if anything I would maybe lighten the color on frankenstein's face, nix my patch of pumpkins and use a lighter purple for the background of the bats or maybe outline them. Overall, I was really happy with the color palette and the selection of designs. I still have to decide what to do on my real nails for Halloween so I am open to suggestions... Any thoughts? 


Saturday, October 11, 2014

↞ ✵ t u r q u o i s e ✵ ↠


When it comes to nail art there are few things I am unwilling to try. Perhaps the only exception is water marbling. A technique that while popular among many, and when execute well--can look quite cool, it is just something I cannot seem to get on board with. When it first gained momentum a few years ago, I tried it out...and failed miserably. Not only did I make a mess, but my nails looked horrible. In my opinion there was far too much work involved in prep, execution, and cleanup for the resulting look. I could have tried again, I suppose, but I guess I just wasn't that keen on the concept...until now. I came across a picture of these stunning turquoise stone nails on Instagram one day and fell in love. After doing some digging later on, I discovered that part of the technique to creating them requires using a variation on the water marbling technique involving hairspray. I loved the look so much, and it was different enough to the usual water marbling design that I figured it was worth a try. The following is a step-by-step on how to get these fabulous turquoise stone inspired nails. Enjoy!

Look I cut my nails! (so short)
For this design you will need: 
  • Nail Foundation (optional)
  • Basecoat (optional)
  • Turquoise Lacquer
  • Metallic/Glitter Silver/Gold Lacquer 
  • Black Lacquer
  • Topcoat
  • Small Piece of Saran Wrap
  • Paper Towel
  • A Few Toothpicks
  • Scotch Tape
  • Hairspray
  • Cup of Lukewarm Tap Water


  1. Paint one coat of nail strengthener. I used butter LONDON's Horse Power Nail Foundation.  
  2. Paint a coat of nail foundation. I used butter LONDON's Nail Foundation's Flawless Basecoat. 
  3. Paint two coats of your turquoise base color. I used China Glaze's For Audrey--a beautiful Tiffany blue. Allow this to completely dry before moving on to the next step (You can even paint one coat of top coat to speed up the process if you are short on time).


  4. As this can get messy, I recommend using scotch tape to tape around your cuticle and the sides of your finger on each nail at this point in the process. It takes a bit of time and looks a bit ridiculous, but it it worth it in the saved clean up time later! 


  5. I wanted to make the look more diminutional, so I added the effect of veins of gold using a saran wrap technique. 
    • Bunch up a piece of saran wrap into a ball.
    • Using a gold (or silver) polish with a slight shimmer or glitter paint a portion of the saran wrap. I used butter LONDON's shimmery gold, The Full Monty. 


    • Dab the saran wrap onto some paper towel to remove excess polish. 
    • Lightly dab painted saran wrap onto each nail in random spots to create subtle veins of color. 


  6. *This phase of the process has to be done efficiently in order for it to look good, so work quickly* Fill a cup with lukewarm water and place in front of you with your black polish and hairspray nearby. 
  7. Place one drop of your black nail polish into the water, and as it spreads, spray it with hairspray allowing the polish to separate into the desired veins and bubbles. If you aren't satisfied with the look of the veins, you may have to use a toothpick to remove it and redo this step until you are satisfied with the look.


  8. Dip your finger in the into the water, positioning it where you want it to get the black on the nail. Using the toothpick, swipe around the nail removing the excess polish from the surface of the water before lifting nail out of the water. 
  9. If you are satisfied with the look of the design, let it dry then remove the scotch tape, paint over it with a coat of SV Topcoat, and clean up any excess polish with acetone remover. 


  10. Voila! Fabulous turquoise nails! 
For Audrey                       The Full Monty                    Licorice 


I'm so happy I took the plunge (literally) and tried this hairspray nail art to get this turquoise effect. I love how they turned out, and have got nothing but compliments! Though the actual water marbling/hairspray portion of the design was a bit tedious and frustrating (especially when I had to redo a few nails that didn't turn out up to my standards) I am really happy with the overall look. 
What do you think? 

feelin blue


Let me tell you, when you spend 8 hours painting your nails and three weeks later they have yet to chip...it's a bit difficult to take the acetone to them. I almost kept the stripes longer but I needed a change and without any nails to paint other than my own, I was left to take off the old design and start fresh. This particular look is a sort of art deco style utilizing negative space yet again and taking advantage of the butter LONDON for Ann Taylor collaboration. 
For this look I started with one coat of butter LONDON's Horse Power Nail Fertilizer. Like my other design featuring negative space, I forwent the Nail Foundation in order to preserve the natural shade of my nail for the unpainted part of the nail. Next I painted a half-moon outline on each nail in white with butter LONDON's Cotton Buds to distinguish the part of the nail that was going to be unpolished from that which was going to be polished. I added a line down the center, then painted some diagonals to be filled in with different colors on each side. 


After I had the basic outline painted in white, I began adding in the different colors. I decided on a blue color pallet. The colors I selected were actually ones that were being featured at Ann Taylor stores for the fall to go with their seasonal collections. I liked the freshness of the color combination so I decided to incorporate the color scheme into my design. I kept the first diagonal unpainted, then painted the second with the beautiful periwinkle Sprog. I painted the following stripe with another Ann Taylor feature color, and a classic neutral shade with a slight shine, Yummy Mummy. For the small triangle on the tips I used a soft grey (not a part of the 3 polish set for Ann Taylor) Lady Muck. Lastly, I filled in the center diamonds with the beautiful Royal Navy and used a dotting tool to add the three dots along the edge of the half-moon of negative space. 


After the spaces were filled in, I used my dotting tool to add a dot of Yummy Mummy in each of the Royal Navy dots...something which I later regretted and covered up with Royal Navy. There are times when I definitely over do things, and that was one of them... it may have actually looked even better without the navy dots, but too little to late for that. 

Sometimes I make mistakes. 
After I fixed the dots, I painted over the white lines and cleaned up the edges to it looked a but sharper. Lastly, I applied one coat of SV Topcoat for a nice lasting shine. I was pretty pleased with the overall look of the design. Thoughts? 

        Cotton Buds                        Sprog                       Yummy Mummy                     Royal Navy                 Lady Muck 


what boredom looks like


When I get bored, instead of turning on the telly, blowing money shopping (i have no money so not an option), or going out with friends (hoping on a plane to NYC...also not an option), I whip out my brushes and polishes and get painting. Painting nails is a way for me to relax and get my creative juices flowing...if only I had that dorm full of hand models to paint at my leisure, but alias I have had to resort to nail wheels. 
This nail wheel was following a sort of loud, colorful, pop art theme. I played with popular symbols, bright patterns, and glittery graphics. I used all butter LONDON nail lacquers for the designs and Seche Vite topcoat to seal them all off. My favorites are the Rolling Stone tongue,  the gold glitter eye, and the mom tattoo. I wasn't crazy about how my bananas (aka french fries?), shark, and lipstick turned out. 
What do you think about these designs? Do you have any favorites? 

stripes on stripes on stripes


By and far one of my absolute favorite designs I have ever done. I was inspired by something from my childhood...a toy, a book, honestly I couldn't put my finger on the actual thing (If you can think of something that it reminds you of let me know because it has been driving me crazy). Not only was it one of my favorite designs but it was one of the most complimented ones I have ever done and lasted a solid three weeks without chipping before I could bring myself to change out the polish. 
To begin the design I painted one coat of butter LONDON's Horse Power Nail Fertilizer and another coat of Nail Foundation Flawless Basecoat. 
The process of painting the stripes was the most time consuming nail design I have ever done. In an effort to make the nails look more unique I painted a color pattern that was completely different on each nail as opposed to painting a stripe of blue on each nail then a stripe of orange etc. Thus I had to paint one stripe of yellow, clean the brush, paint a stripe of red, clean the brush, paint a stripe of black, clean the brush etc. and do that about 17 times on each nail on each hand. My patience is only so great so after about two nails I would take a break and do something else around the house then come back for two more. This was about an 8 hour nail design...not something I would recommend to anyone on a time crunch. 


For the stripes I used a number of different polishes from a few different brands. My goal was to use the brightest, boldest shades I had for a few key colors I wanted to include. I used Essie polishes for both my black (Licorice) and white (Blanc) as well as the vibrant blue (Butler, Please). For the bright purple I used Illamasqua's Jo'mina. The remaining brights I used butter LONDON polishes: yellow (PIMMS), green (Sozzled), orange (Silly Billy), and red (Ladybird). After painting many, many, many stripes I topped it off with one coat of butter LONDON's Hardware P.D. Quick Topcoat which lasted quite well since I didn't get a chip on these nails for three weeks. 


What do you think about this design? Are you as mad for these as I am? 


inked


This design ended up being much less complicated than I initially planned for it to be. Apparently I have been having a harder time than I thought breaking free of this simple white nail trend I seem to be hooked on. Originally I was going to add some neon stripes and geometric detail but loved the simplicity of the black and white diamonds so much that I just left it as is. 
To start the design, I painted one coat of butter LONDON's Horse Power Nail Fertilizer and another coat of Nail Foundation Flawless Basecoat. Next, I painted two coats of the white Cotton Buds. Using Union Jack Black, I painted the diamond geometric pattern on each nail. More time consuming than it appears, yet simple in affect--I loved the overall look. To finish the design I painted one coat of SV topcoat. 


For fun I applied some of my favorite black and silver Flash Tattoos on my fingers and hands to add some dramatic flair. 


What do you think about the design? Should I have added more to it, or was it right to go with my gut and leave it as I did just simple black and white? 

rouge


The holy grail of nail polish--Louboutin Rouge, the first nail polish from the legendary shoe designer Christian Louboutin. At $50 a pop, this polish falls heavily into the luxury category of nail varnishes. As someone who obviously puts a high value on nail polish, I would guess that I am more inclined to purchase this than the average consumer...even so I hesitated quite a bit before handing over the big bucks for this bottle. I think the key in deciding to purchase a Louboutin polish is the recognition that it is a luxury product and you are paying for high quality varnish, the artistry of the bottle and the brand it is associated with. Knowing that, and having an appreciation for nail polish, I would actually say it was worth what I paid for it. The bottle is a work of art with the black and red ombre glass and the 8 inch stiletto wand designed after the Louboutin Ballerina Ultima shoe. The formula itself is quite nice with two even one coat being good enough coverage. The red is the exact shade of the bottom of those iconic Louboutin soles. Fitting that Christian Louboutin would launch his cosmetic collection with nail polish as he is known early in his career for famously grabbing a bottle of red nail polish from his assistant and painting the sole of a shoe he was working on red to make it more vibrant--thus the Louboutin shoe as we know it was born. Personally, I own at least 20 o 30 different red colored polishes but none quite the right, bright, vibrant shade of red that Louboutin Rouge offers. What are your thoughts on this line of polishes from the shoe king? Worth the price? 

n e g a t i v e s p a c e


Despite my love of nail art, I have always had an affinity for plain white nails. In an attempt to do something both unique and simple, I decided to play with the idea of negative space--leaving part of the nail unpainted. Unlike my usual routine, I did not use a coat of butter LONDON's Nail Foundation in an effort to avoid discoloration of the natural nail and disruption of the negative space affect. I started by painting an outline of the starburst pattern at the nail bed with butter LONDON's white Cotton Buds on each nail. After I completed the outline, I filled in the top with two coats of the white. To finish the look I painted one coat of Seche Vite top coat for a nice defined shine over the natural nail, and a coat of Essie's Matte About You matte topcoat over the white for some differentiation. Being a freehand artist I don't every use tape in my designs, however in this particular design I think it would have looked better had I used tape as the definition would have looked a bit better if it were more pronounced. What do you think of this negative space look? 


Monday, July 21, 2014

patternpolooza


After my flamingo fiasco, I was still determined to do something fabulous. Unfortunately this mani was wrought with issues from the beginning just like the last (I need my mojo back). I stumbled across this design on Pinterest accredited to Flight of Whimsey and rather liked how it looked. First mistake was starting this at 3AM. Anyway... it was a pretty complex paint job, but here's the basics of how I did it. 

I started as I always do with one coat of butter LONDON's Horse Power Nail Fertilizer and one coat of their Nail Foundation Flawless Basecoat. Next I painted each nail with their respective base color: Keks on the thumb, Union Jack Black on the pointer and ring finger, and Pillar Box Red on my middle finger and pinky.

After that had set I began the rather laborious process of replicating the design on each finger. I used a variety of brushes and dotting tools from my Bundle Monster nail set and the additional polish shades of Cotton Buds (white), PIMMS (bright yellow), and Silly Billy (a peppy orange). Once I had painted everything I finished it with a coat of SV Topcoat. 

Shown completed with butter LONDON's Silly Billy

Most likely because i was painting in the early hours of the morning after a full day of work (WHHYYYYY???) I kept messing up one nail and wasn't entirely satisfied with the overall product. To add insult to injury, a few days after completion I slammed my hand in a door and it ripped off a nail from the bed and I'm pretty sure something is broken because a few fingers are still numb. Like I said this mani was cursed from the get go. So you know I'm not satisfied with it, but I would still love to know your thoughts!

flamingo fail


Unfortunately this has been one of those times where I have been in a serious nail design funk. I just haven't been feeling that inspired lately, so when I came across a really fun Lily Pulitzer flamingo print I thought this could make for a cute summer mani. Sadly it didn't quite go as planned. I'm posting it anyway because maybe someone will like it or someone will have a good idea for how I could have fixed it... 


I started with all white nails courtesy of one coat of butter LONDON'd Horse Power Nail Fertilizer, one coat of Nail Foundation Flawless Basecoat, and two coats of Cotton Buds.


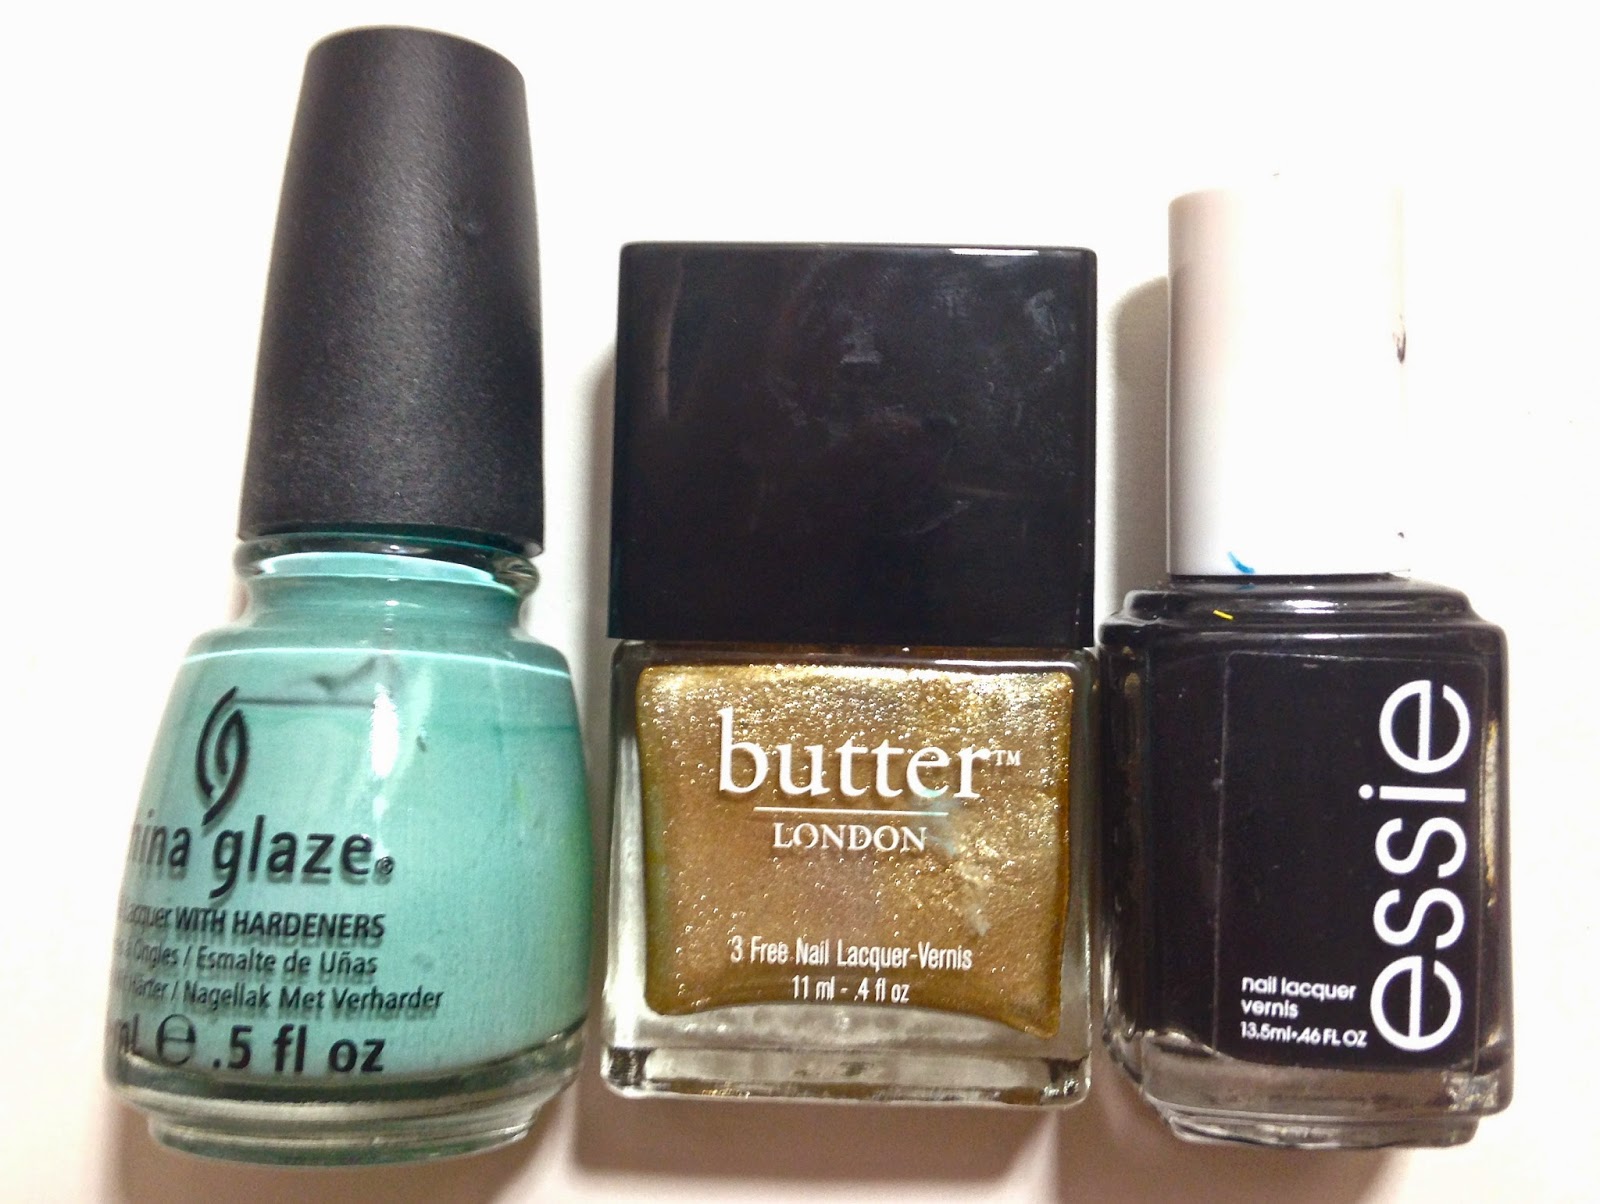
 Next on my thumb and ring finger I decided to try and replicate the pretty aqua color of the pattern. Surprisingly, none of my polishes were quite right so I mixed a color using butter LONDON's Slapper (the closest shade I had, but a little too teal), Poole (a light blue) and a dash of Wellies (a bright yellow green to brighten up the color). It ended up being pretty close, though the lighting doesn't do it justice. I painted two coats of my custom color over the thumb and ring finger and let dry. Next I began the tricky part of painting the flamingos. I have seen numerous flamingo nail designs over the years, but they all end up looking the same. I loved how these Lily Pulitzer flamingos were so fluffy and had so many shades of pink in them. 

I started by painting the main body of the flamingo using a light pink shade, Teddy Girl. Next using the darkest pink color I had selected for my pallet, I painted the outline of the feathers with Macbeth. Next I added all the other feathers alternating with a light coral (Kerfluffle), a darker coral (Trout Pout), a soft pink (Fruit Machine) and Macbeth and Teddy Girl. After I finished with the body, I painted the beak and eyes using Union Jack Black. I finished the look off with a coat of my favorite SV Topcoat. 

The less favored left hand
In my opinion the right hand looked better even though my non dominant hand painted it
I ended up liking the flamingos on my right hand better oddly enough but I think the ones on my left hand though not as nicely executed look more like the Lily Pulitzer ones. After I finished the time consuming process of painting the flamingos I realized it looked rather unfinished with the plain white nails. I didn't want to add any additional designs to the other nails fearing it would make it too busy looking. However it looked like it was incomplete just leaving it white. I started painting it over in the aqua shade I made, but then the flamingos just blended in, so I scratched that and tried painting them over in one of the pink accent shades. 

Ewwww. See what I mean... not quite right. 
Once again I was unsatisfied. I ended up repainting them white, going to bed and taking it all off the next day...flamingos and all. Sometimes when you aren't feeling that inspired it's best not to force it. 
What do you think about this flamingo failure? Do you have any ideas for how to fix it?